There are two editions of BackTrack 5 R2 – a GNOME 2 edition and a KDE edition. (BackTrack 5 R2 is the
latest
release of BackTrack.) This tutorial shows how to create partitions
manually for installing BackTrack 5 GNOME. A future article will show
how to do the same for the KDE edition. A side objective of this
tutorial is to demonstrate that BackTrack 5 R2 can be installed
completely on logical partitions. So all the partitions that will be
created in this article, will be logical partitions. This could come in
handy in a situation where you want to dual-boot it with another
distribution or operating system, but where there is only one primary
partition left in the target hard drive, or where the only free space
left is on an extended partition.
Note: Live DVD installation images of BackTrack 5 R2
GNOME and KDE are available for download, which means you do not have
to install them to a hard drive.
If you are new to disk partitioning in Linux, it is highly recommended that you read
guide to disks and disk partitions in Linux. If you have not done so already, download the GNOME edition of BackTrack 5 R2 from
here. Burn it to a
DVD and boot your computer from it.
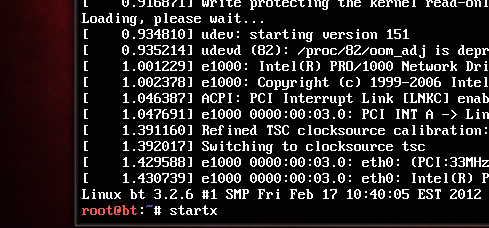
The boot menu is shown below. Selecting the default or first option should cause the system to boot into a Live environment.
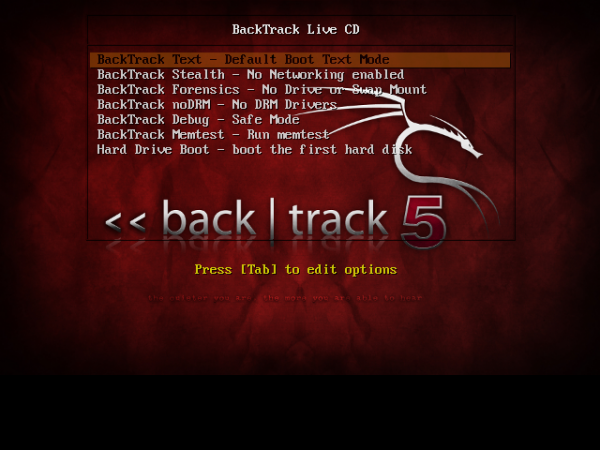
However, it is not a graphical Live environment. You will need to start the graphical desktop manually. To do that, type
startx at the command prompt. The system should now boot into a GNOME 2 desktop. To start the installation, click on the
Install BackTrack icon on the desktop.
BackTrack 5 is based on an older edition of
Ubuntu,
so if you have used a previous release of Ubuntu, the installer should
be very familiar. It is just a 7-step installer, but the disk
partitioning part starts at Step 4, so click until you get to that step.
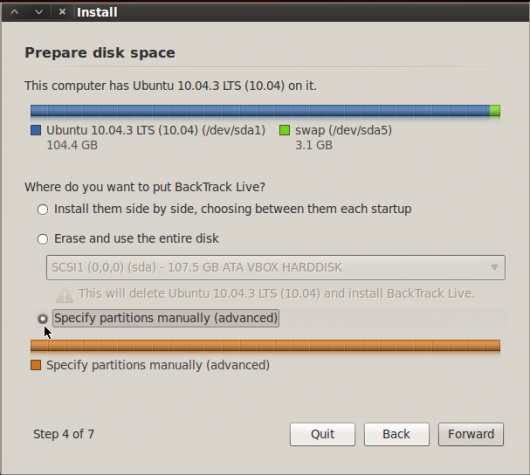
The step in question is shown below. Since the objective is to create
partitions manually, select the option that says,
Specify partitions manually (advanced). Click the
Forward button.
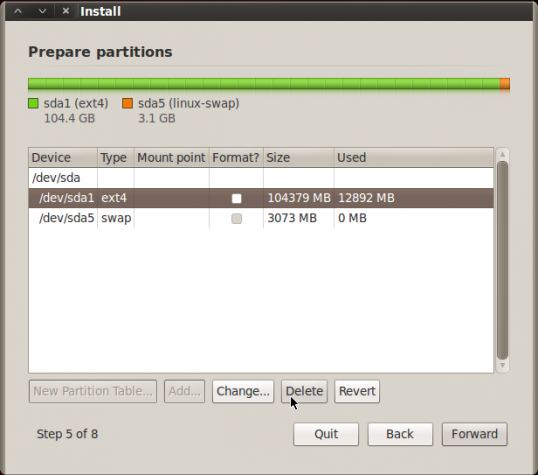
That should get you to this window, where all existing
partitions on the target hard drive should be listed. The system used
for this tutorial had an existing installation of a Linux distribution
on it, but I will be deleting the partitions, freeing up all available
space.
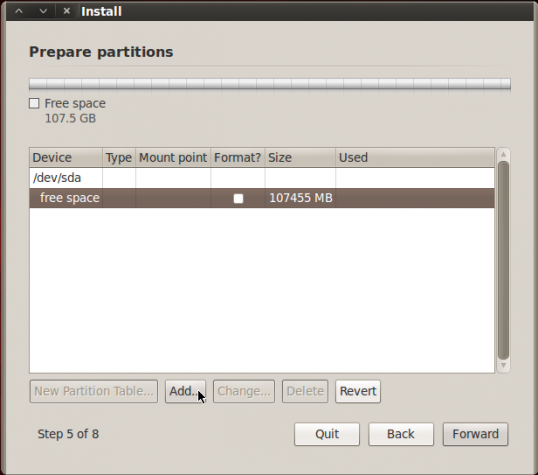
Ok, all available space has been liberated. Time to start creating partitions. Select the free space and click
Add. Keep in mind that three partitions will be created for installing BackTrack 5 R2. These are a
/boot, /, and Swap
partitions. And in line with the objectives of this tutorial, they will
all be logical partitions. On a default installation, the installer
creates just two partitions – / and Swap.
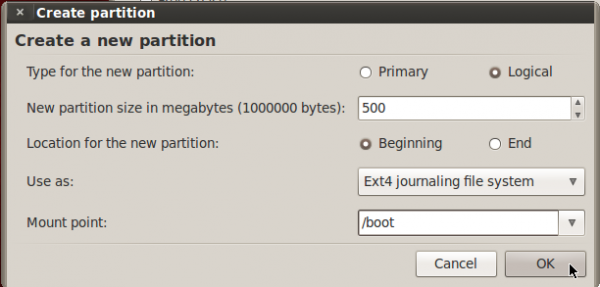
The first partition will be mounted at /boot. This is where
all boot-related files and programs will be located. GRUB Legacy is the
boot loader, so this is where its files will be located. On a new
installation of BackTrack 5 R2, the boot partition takes up about
83 MB of disk space,
so any value more than 100 MB should be good for the size allocated to
it. For this tutorial, I allocated 500 MB to it. For the file system
(Use as), I chose Ext4. You could choose any other file system from that
dropdown menu, but Ext4 is now the default on virtually all Linux
distributions. Note that the installer will attempt to create it as a
primary partition, so remember, if your use case is the same as mine, to
select
Logical before clicking
OK.
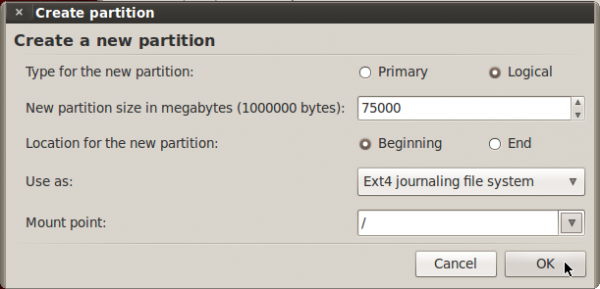
For the second partition, which will be mounted at /, which
all the programs will installed, you can assign as much disk space as yo
have available. How much will depend on how you want to use the system.
Note that a new installation of BackTrack 5 R2 GNOME takes up more than
12 GB of disk space, so this partition should be assigned at least 20
GB. That is for a test system. Choose Ext4 for the file system too, and
/ as the mount point. Just to note, I also created it as a logical partition.
OK.
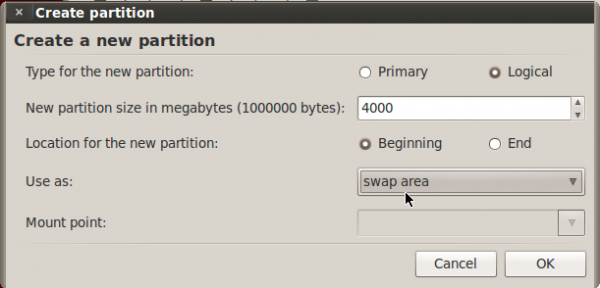
For the Swap partition, which will be the last, a disk space
of 4 GB should be enough. For guidance on how much disk space to
allocated to Swap, see the answer to a question at the Forum.
OK.
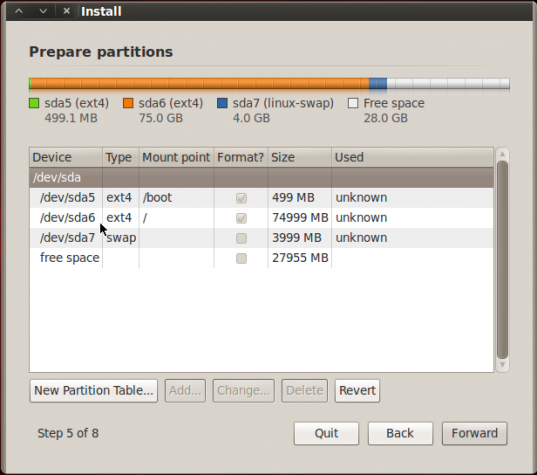
Back to the main partitioning window, you should see the
partitions you just created. Because they are all logical partitions,
the partition numbers begin from 5, which is the first logical partition
number on a
Linux system. Notice that I left some disk space unallocated. You do not have to do the same, but it never hurts. Click
Forward to continue with the rest of the installation.
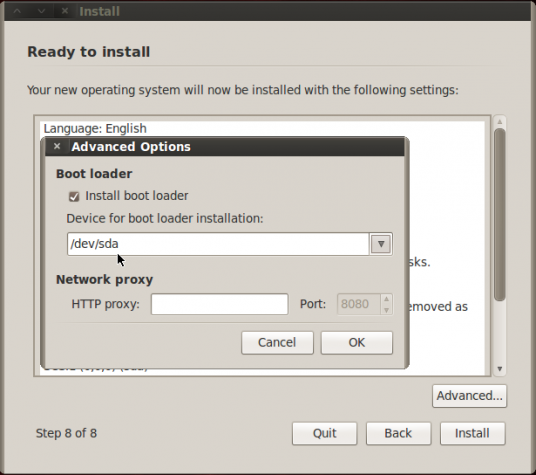
The next important task to consider for any installation of
BackTrack 5 R2, GNOME or KDE, is where GRUB, the boot loader should be
installed. By default, the installer will want to install it in the
Master Boot Record
(MBR). That is tech jargon for the beginning of the hard drive. This is
good, if BackTrack is going to be the only operating system on the hard
drive. On a dual-boot system, say with Windows 7, where you do not want
GRUB to overwrite the contents of the MBR, the best location for GRUB
will be the boot partition. In such a case, this is where you change the
location for GRUB. By the way, you access this inset window by clicking
on the
Advanced button at Step 8 of the installation process.
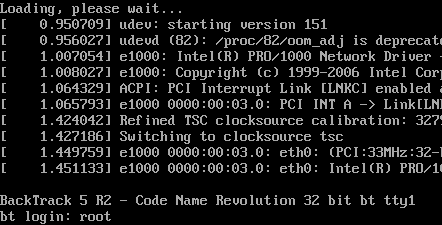
After installation has completed and on reboot, BackTrack
will not boot into a graphical desktop. You will find yourself staring
at a command prompt. You are expected to login, then start the graphical
desktop. To login, use
root as the username, and
toor as the password. Once logged in, start the graphical desktop by typing
startx at the command prompt.
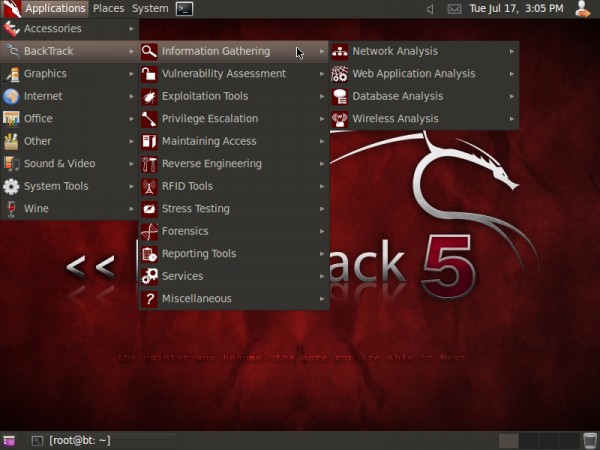
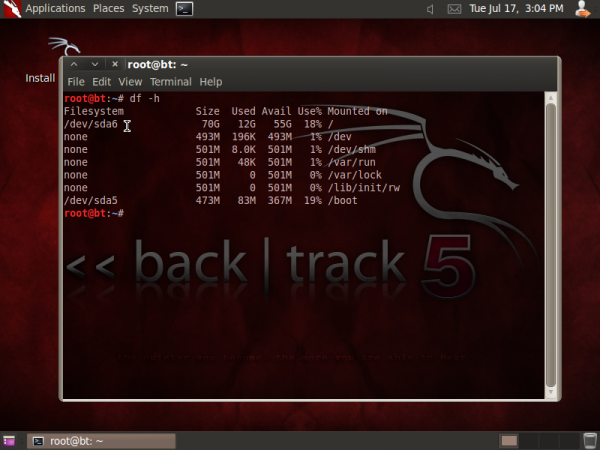
This is what the desktop should look like. In this
screen shot, notice the amount of disk space used for the / and boot partitions in the output of
df -h.
Sumber: http://www.linuxbsdos.com/2012/07/17/manual-disk-partitioning-guide-for-backtrack-5-r2-gnome/